Table of Contents
Web Sharing
The Web sharing functionality of Vizy allows you to interact with your Vizy outside of your local network through a secure https connection. It essentially gives your Vizy a URL that's accessible from anywhere on the Internet. From this URL you can access everything you can normally access, including all apps/examples, the app console, command shell, and file editor.
Additionally, when you change the camera brightness (for example) the brightness slider will move in all browser instances, including remote instances. Vizy's software was designed to accommodate multiple viewers.
(Note, Web sharing requires Vizy software version 0.1.94 or later. As of version 0.1.97, the video window will not render in devices running Apple's IOS if connected remotely.)
The simple way
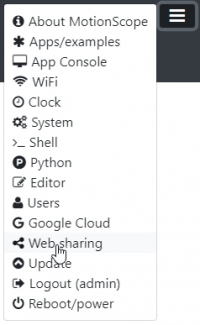
Setting up Web sharing is simple and quick. Click on the ☰ icon in the upper right corner (Settings Menu), and select Web sharing.
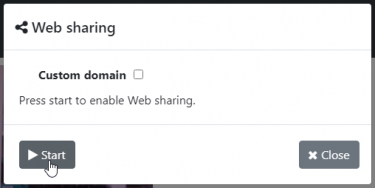
From the Web sharing dialog, then press Start.
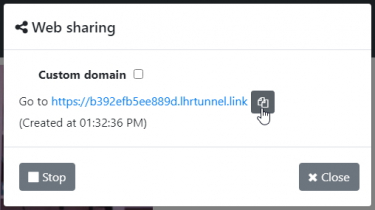
You will be provided with a unique URL that you can use to access your Vizy remotely. Click on the copy icon  to copy the URL to your clipboard, or click on the provided link.
And that's it. ![]() There are some important caveats however:
There are some important caveats however:
- The URL will change approximately every hour.
- If you are connected while the URL changes, you will stay connected. (It won't kick you off.)
- But new connections need to use the latest URL.
- Connections are subject to network and server capacity.
So for example, you wouldn't be able to access your Vizy from your hotel room later that evening, because the URL will have changed by then. You can, however, email or text the URL to a friend, and they can access your Vizy. And as long as they stay connected through their browser, they can access your Vizy indefinitely.
This method is simple and secure and gives you an idea of what's possible. A fixed and custom URL is more useful, but to set it up you need to jump through some extra hoops.
Not as simple, but not too bad: setting up a custom URL
Setting up a custom URL has some distinct advantages:
- The URL won't change, so you can access it at any time.
- You can configure Vizy to enable the URL on start-up.
- You can connect to an unlimited number of Vizys through it.
- Custom domains are treated with higher priority by the servers.
But it costs $3.50 per month (cue sad trombone sound). (Note, we're not affiliated in any way with the server provider localhost.run. They require no registration for the free connections (we used them in the previous section), and their custom domains are low-cost, so we chose them as the default provider.)
To set up a custom URL click on the localhost.run button, which will bring you to the localhost.run website. Log in by either using your email or your Google account. Start by clicking on SSH Keys  at the top of the page followed by New.
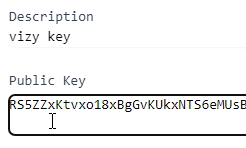
Type in a description (e.g. “vizy key”) and then paste the key text into the Public Key field – you can get the public key by clicking on Copy key  from the Web sharing dialog on your Vizy – this will copy the key text into your clipboard so it can be pasted.
then click on Save.
Next, click on Domains  at the top of the page to set up your domain name. It's recommended that you use their default “lhr.rocks” subdomain because it's the simplest to set up. Pick a unique identifier (e.g. “javelina”) and type in
 javelina.lhr.rocks into the domain field.
Set up your payment information by clicking on Account  . Each custom domain costs $3.50 per month, but you can connect multiple Vizys through a single domain.
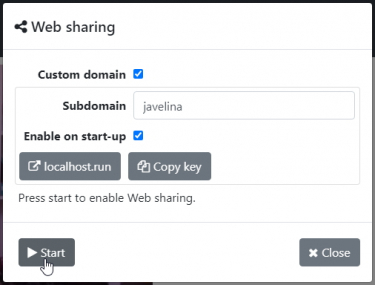
Once everything is in place with localhost.run, go back to the Web sharing dialog on your Vizy, click on Custom domain and type the subdomain that you chose (e.g. “javelina”) into the Subdomain field.
You should now be able to press Start and enable the URL using your custom domain. Nice work!
Connecting to multiple Vizys through the same custom domain
If you want to connect to more than one Vizy, you can change the Subdomain field from “javelina” (in our example above) to “vizy1.javelina” for the first Vizy and “vizy2.javelina” for the second Vizy, and so on. You'll also need to copy the key files from your first Vizy into your other Vizy(s). The two key files are /home/pi/vizy/etc/remote_key and /home/pi/vizy/etc/remote_key.pub. This page will help you get files into and out of your Vizy.
Enabling the URL on start-up
In the Web sharing dialog, you can check the Enable on start-up and Vizy will enable the URL automatically when it initializes after turning on.
