Table of Contents
Object Detector Application
Overview
The Object Detector is an application that detects objects, logs the detections, and texts you when it detects objects that you are interested in. It also is a studio that you can use to create custom CNN's (convolutional neural networks) to detect practically anything you want using deep-learning training techniques.
Out of the box, Object Detector detects 80 different common objects: bicycles, cars, motorcycles, airplanes, buses, trains, trucks, boats, traffic lights, fire hydrants, stop signs, parking meters, benches, birds, cats, dogs, horses, sheep, cattle, elephants, bears, zebras, giraffes, backpacks, umbrellas, handbags, ties, suitcases, frisbees, skis, snowboards, sports balls, kites, baseball bats, baseball gloves, skateboards, surfboards, tennis rackets, bottles, wine glasses, cups, forks, knives, spoons, bowls, bananas, apples, sandwiches, oranges, broccoli, carrots, hot dogs, pizza, donuts, cake, chairs, couches, potted plants, beds, dining tables, toilets, tv's, laptops, computer mice, remotes, keyboards, cell phones, microwaves, ovens, toasters, sinks, refrigerators, books, clocks, vases, scissors, teddy bears, hair driers, and toothbrushes.
It uses the recent EfficientDet convolutional neural network (CNN) detector implemented in the TensorFlow Lite framework.
However, what if you want to detect something that isn't in the list of common objects? Object Detector can guide you through the process of creating your own detection network, which includes acquiring pictures, training the network model, testing the network model, and evaluating its performance. The process of creating your own CNN can be complicated, but Object Detector simplifies and speeds up the process.
Getting started
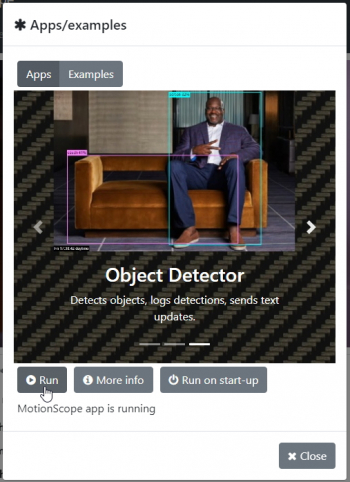
Begin by turning on your Vizy and pointing your browser to it. (Please refer to the getting started guide if you need help with connecting to your Vizy, etc.) Run the Object Detector application by clicking on the ☰ icon in the upper right corner and selecting Apps/examples. Then scroll over to Object Detector in Apps, then click on Run.
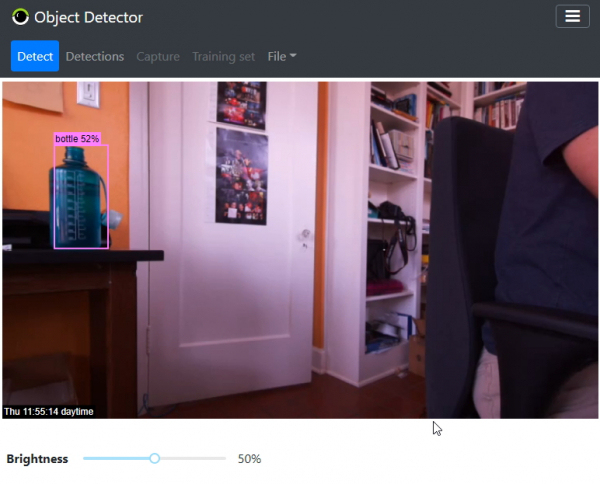
The Object Detector application takes several seconds to start up. You'll be presented with a screen similar to below. The image at the top of the screen is the live video feed of what Vizy sees.
When you run Object Detector for the first time, it will run its default CNN model, which detects common objects, and it's name is Common Objects. To test, you can present various objects such as a bottle, cup, scissors, and yourself (person). Bear in mind that some objects such as forks and spoons rely to some degree on contextual cues such as tables and plates. You can adjust the detection sensitivity (see section on Controls and Settings), depending on how many false negative detections (increase sensitivity) or false positive detections (decrease sensitivity).
Media Queue and Detections Tab
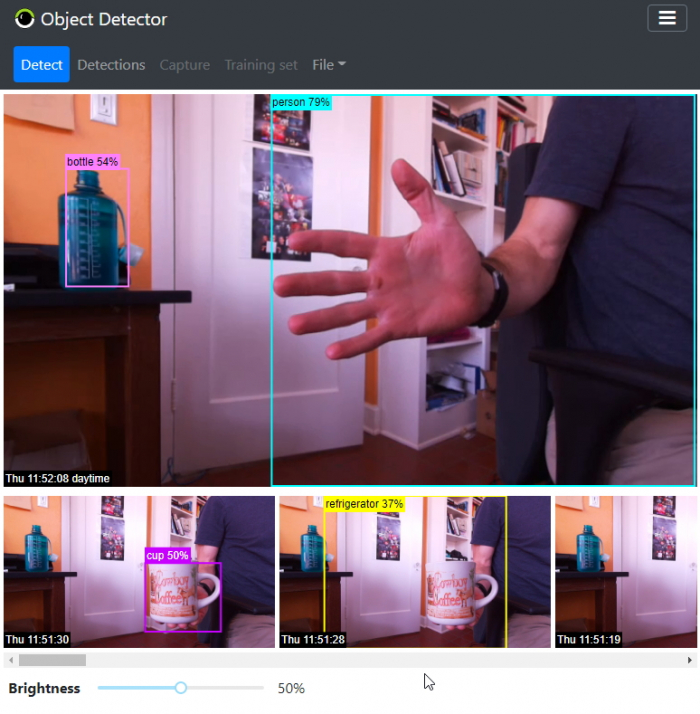
You'll notice that Vizy will keep track of recently detected objects by displaying a picture and timestamp of the detected object in the media queue as shown.
Vizy keeps track of each detected object and does its best to determine when objects first enter the scene and when they leave the scene. When an object leaves the scene, Vizy will pick a “good” picture and add it to the media queue. This way you can get a quick sense of recent activity by scrolling through the media queue's pictures.
The Media Queue will only keep track of a few of the most recent detections. The Detections Tab, however, allows you to view all detections.
Controls and Settings
The Brightness slider gives you control over the brightness of the pictures and live video feed.
Settings dialog
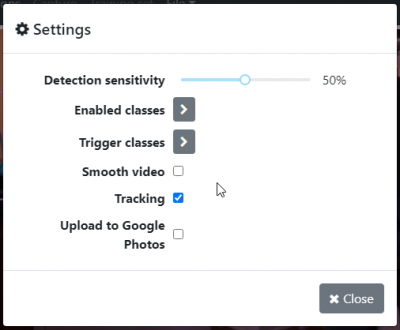
You can bring up the Settings Dialog by selecting Settings… from the File menu.
- Detection sensitivity: Increasing the sensitivity will result in more detections, but possibly more false positive detections. Decreasing the sensitivity will result in fewer detections, but possibly more false negative detections.
- Enabled classes: Check the checkbox of object classes that you're interested in and clear the checkbox of the classes that you're not interested in. The enabled classes will be logged in the media queue.
- Trigger classes: Check the checkbox of object classes that you want to trigger events – in particular, texting a picture of the detected object – and clear the checkbox of the classes that you don't want to trigger events. See the section on Texting.
- Smooth video: Enabling smooth video will make the streaming video smoother, but increase the time it takes to detect objects (latency).
- tracking: Disabling tracking will turn off the Object Detector's memory of what objects it's seen in recent frames. The “tracking” ability allows Vizy to determine when an object enters or exits the frame.
- Upload to Google Photos: Enable this if you want the media items in the media queue to be uploaded to Google Photos. Google services need to be configured, however. See the section on Configuring Google services.
Configuring Google services
Your Vizy can upload pictures to Google Photos and interact with Google's Colab servers so you can train your own custom CNN's. In order for these things to happen, you'll want to set up Google services.
Once you've set this up, other Vizy applications will have access to Google cloud services such as Photos, Gmail, Sheets, Colab, and Google Drive.
Texting
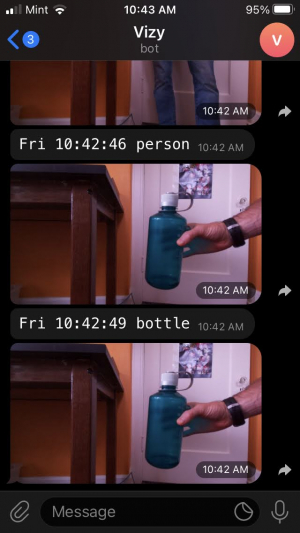
Vizy's texting service allows Vizy to send updates typically to your phone. Vizy texts pictures of objects it detects that are enabled in the Trigger classes checklist (see settings). The picture below is from the Telegram smartphone app.
Or you can ask it to show you pictures of the most recent detections (see Text commands below). One of the advantages of texting is that you can interact with your Vizy from practically anywhere. It's also quick!
Text commands
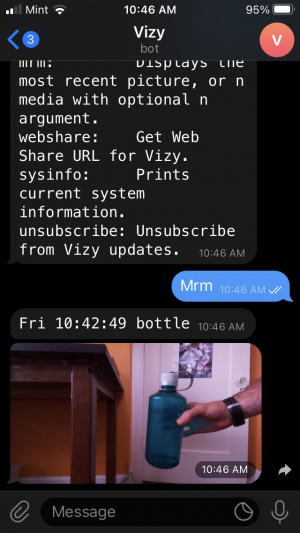
Currently, the only text command that the Object Detector supports is mrm (most recent media). For example, to get information (description and picture) of the most recent detection:
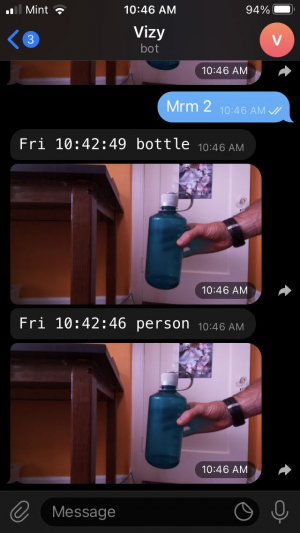
Or you can get the N most recent detections by adding a number:
Creating your own CNN detection network
The Object Detector application includes the ability to make your own CNN models to detect practically anything that you want. Once you create such a model, Object Detector can use it to log the detections, upload the detections to Google Photos, and send you text notifications if you wish. Additionally, you can use the CNN's you create with other applications, Vizy-related or otherwise. The models are easy to share, and the process of creating them provides a good introduction to CNN's and a deeper understanding of how they're created, how they work, and how they sometimes don't work. Creating your own CNN happens in the following steps:
- Gathering pictures
- Labeling
- Training
- Testing
- Improving
Object Detector will guide you through these steps, reducing the amount of time it typically takes to create a CNN.
Prerequisites
These prerequisites are important:
- Configure Google services for your Vizy. Your Vizy will be using Google Drive and Google Colab servers to train our CNN.
- Use Chrome as your browser for training. You will be switching browser tabs between Google Colab and possibly Google Drive. Chrome is going to be able to retain your Google permissions in the most predictable way.
- Within Chrome, use your Vizy's Google account profile. The profile is reflected in the upper-right corner of the Chrome window – click on the avatar as shown below, and change the profile account to the same account you used to create the Google API key and authorization (what we're calling your “Vizy's Google account”).
Create a new project
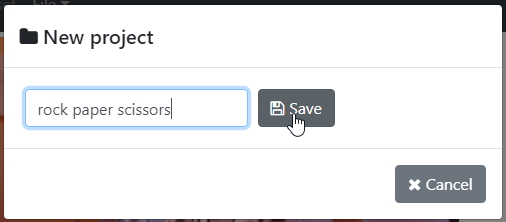
From the File menu select New… to bring up the New project dialog.
Type the name of the project into the text box and click on Save. For demonstration purposes, we'll create a network to detect rock, paper, and scissors hand gestures.
Gathering pictures
You may have heard that CNN's require hundreds or thousands of pictures to achieve reasonable accuracy. We're going to use the technique of transfer learning which takes an existing CNN model (in this case, the common objects model) and freezes the lower layers which have been already been trained effectively for feature extraction. Only the upper layers will be modified to detect what we want to detect, which greatly reduces the image-gathering burden. In fact, you can train a CNN detection network using transfer learning with as few as 25 images per class.
Capture tab
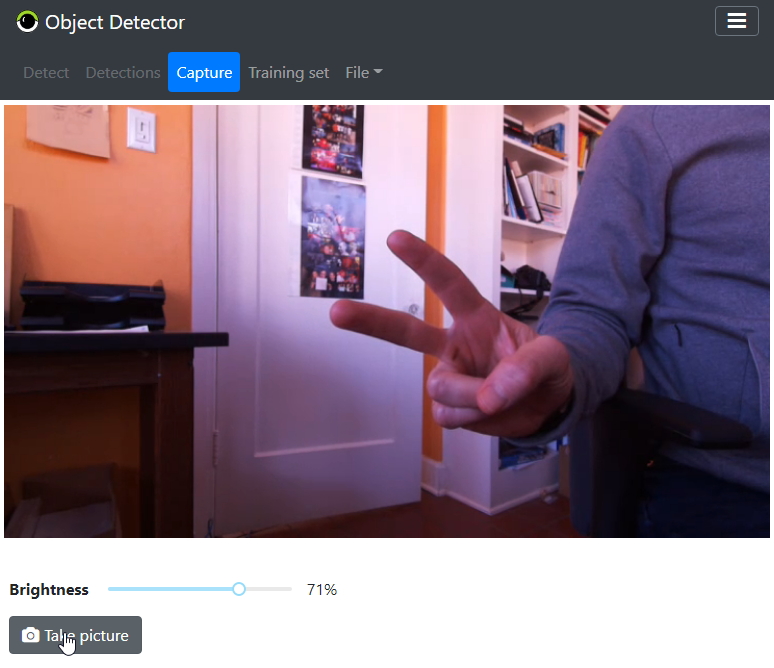
After creating a new project, you'll find yourself in the Capture tab. From here you can take various pictures of what you want to detect by clicking on the Take picture button.
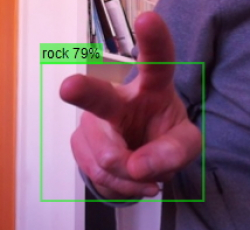
In our example, there are three “classes”: rock, paper, and scissors hand gestures. We want our detector to work at various scales and orientations, so we vary the scale and orientation of the captured pictures. You'll want to take about 25 or more pictures of each detection class to provide a reasonably complete representation of what each class looks like to the CNN. Bear in mind that it may be obvious to you (as a human) that the two pictures below are scissors, but to the CNN, they look quite different.
By capturing the different orientations and saying they are equivalent (e.g. scissors), the CNN learns which characteristics/features it should use to differentiate between classes.
Labeling
Once you've captured a “decent” amount of pictures, you can begin the labeling process. Don't be too concerned about whether you've gathered enough pictures. During testing, you'll determine where your CNN is failing and how to augment the training set to increase accuracy if necessary.
Training set tab
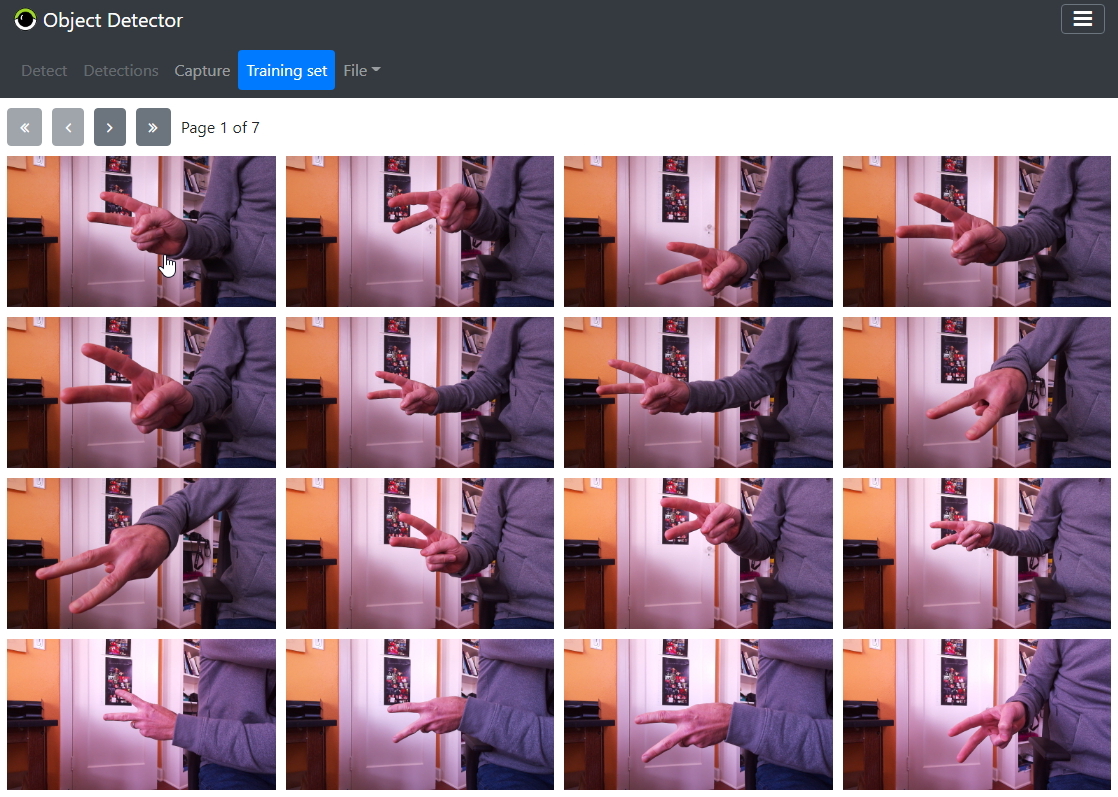
Switching to the Training set tab, you'll see all of the pictures you just captured.
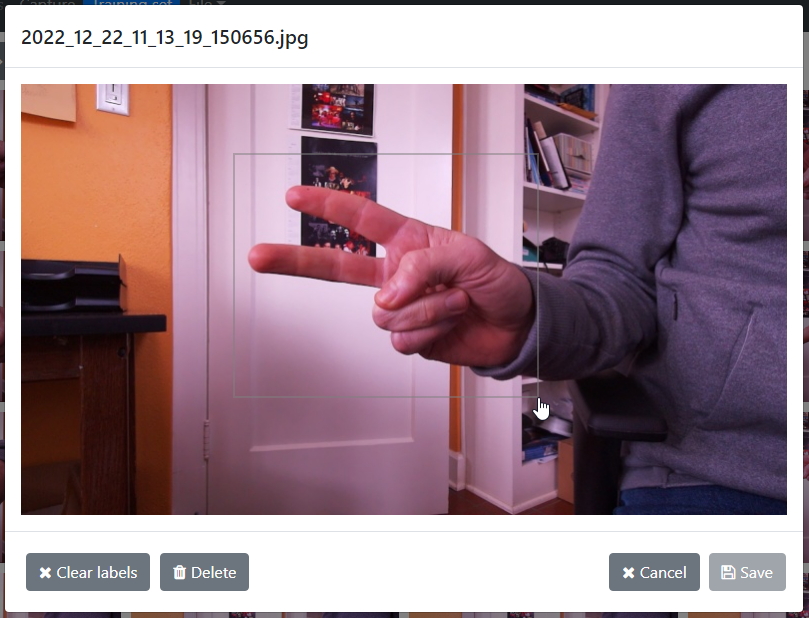
Click on one of the pictures in the grid to bring up the picture dialog.
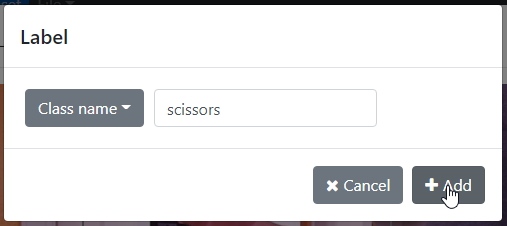
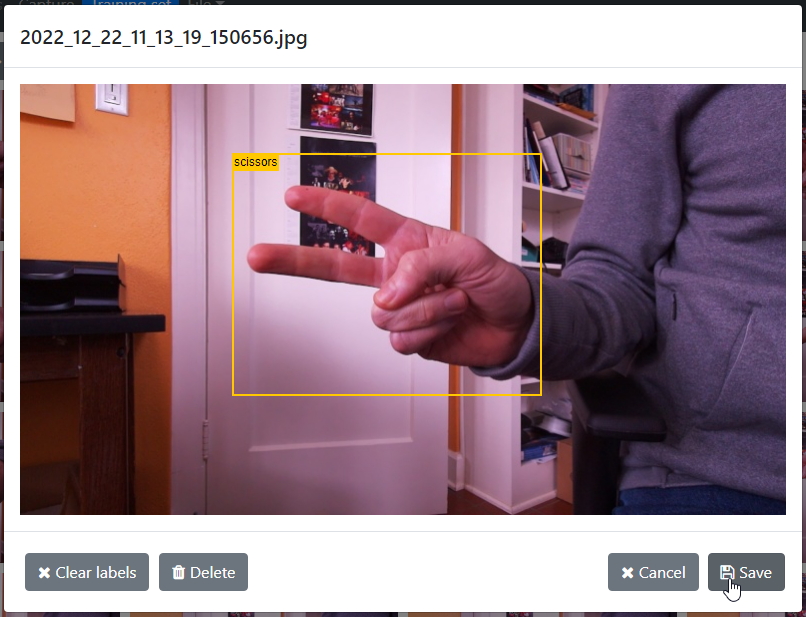
From here you can click and drag a rectangle around the object. The rectangle should include all parts of the object, but not much more. The rectangle doesn't need to be an exact fit, but it should be reasonably accurate – refer to the picture above for a general idea. After selecting the rectangle, the label dialog will appear. Here, you can type in the name of the class.
After typing in the name of the class, click on the Add button. Then click on the Save button to commit the label(s) for that picture.
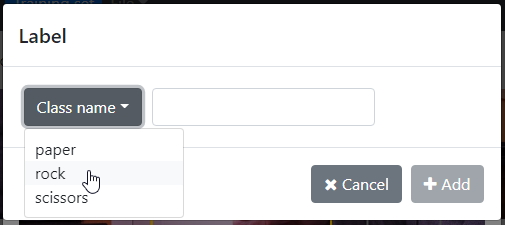
Once you've typed in the name of a class, you can choose the class from the dropdown menu for subsequent labels.
Continue to label all of the remaining pictures in this way. You can use the navigation buttons at the top of the Training set tab to navigate between pages (see below).
Training
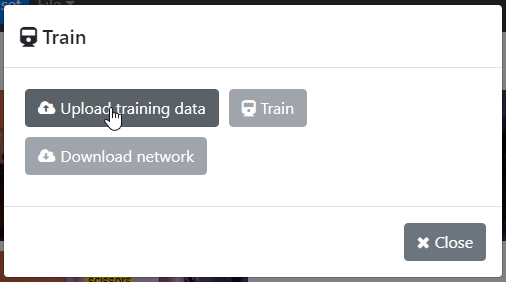
After you have labeled all images in the training set, you are ready to train your CNN and create a model for testing. From the File menu select Train… to bring up the Train dialog.
Click on Upload training data. Vizy will then get busy zipping-up all of the images and copying them into Google Drive. This will take some time, depending on how many images you have in the training set. After it has finished, click on Train, which will bring up a Google Colab browser tab. (Google Colab is a Python notebook, similar to Jupyter. It includes access to GPU resources for increased processing speed, especially for training CNN's. It's free to use, and ideal for training our CNN.)
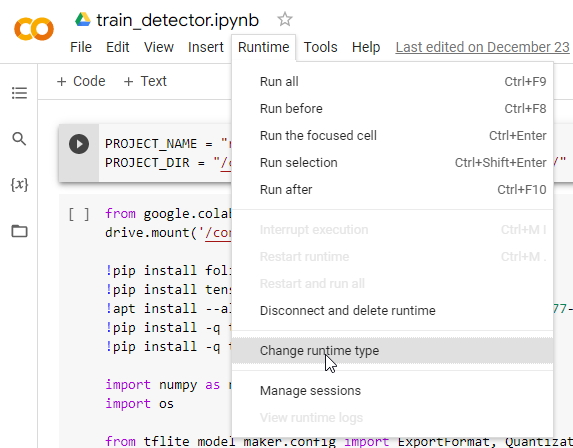
Begin by selecting Change runtime type from the Runtime menu.
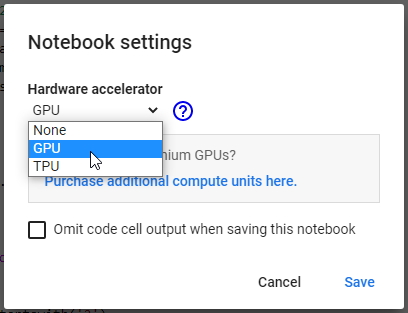
and selecting GPU.
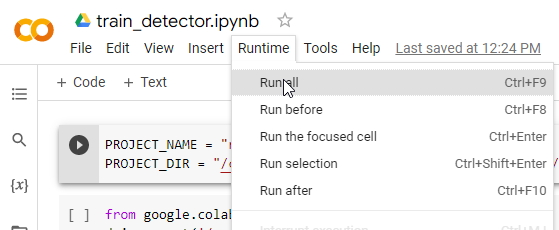
Then select Run all from the Runtime menu, which will start running the training script.
Almost immediately after it starts running, you'll get some extra messages, as shown below (click OK).
You will also be asked to give Google Colab access to Google Drive, as shown below (click on Connect to Google Drive).
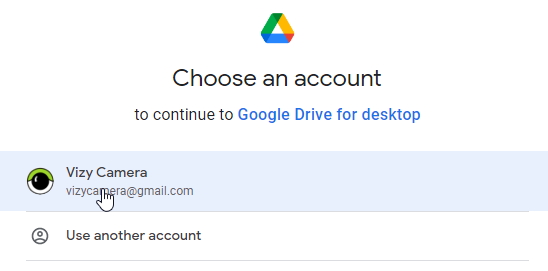
This will lead to a familiar Google authorization below.
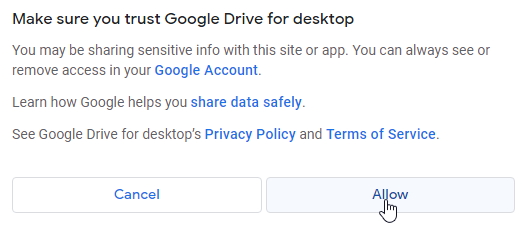
Choose the Google account associated with your Vizy, followed by clicking on Allow.
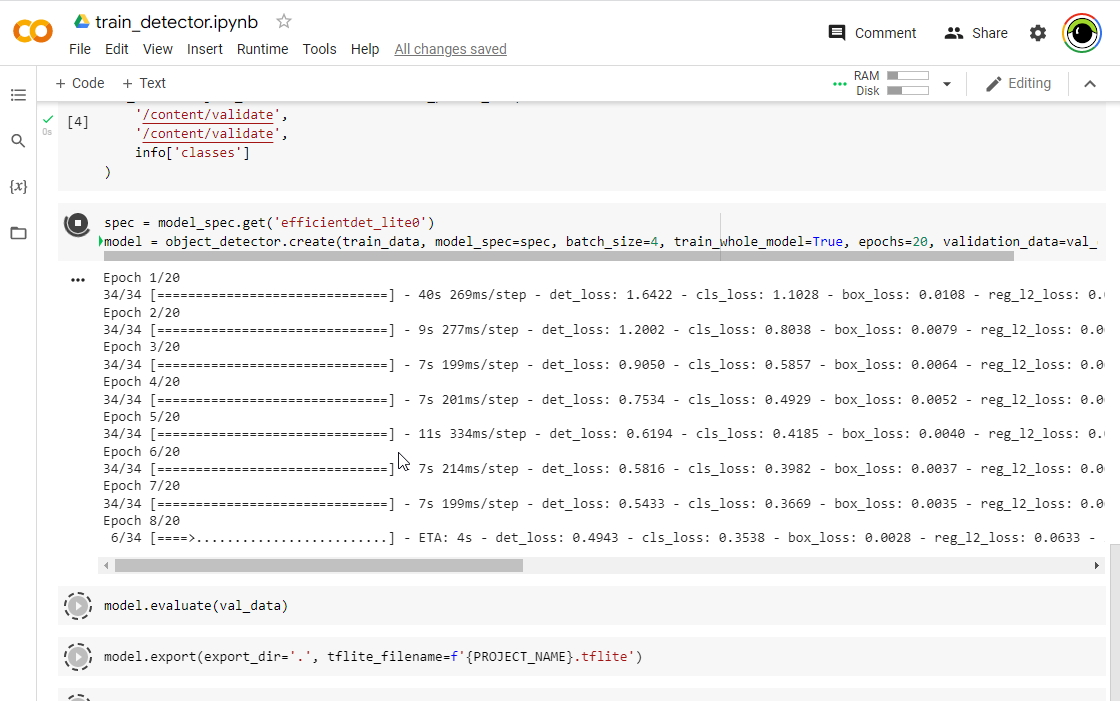
After navigating through these, Google Colab will get busy training your CNN. It will take several minutes depending on whether a server with GPU resources is available. The actual training takes place with the call to object_detector.create about halfway through the script. You can watch the detection loss (det_loss) decrease with each training epoch as shown below. It's learning!
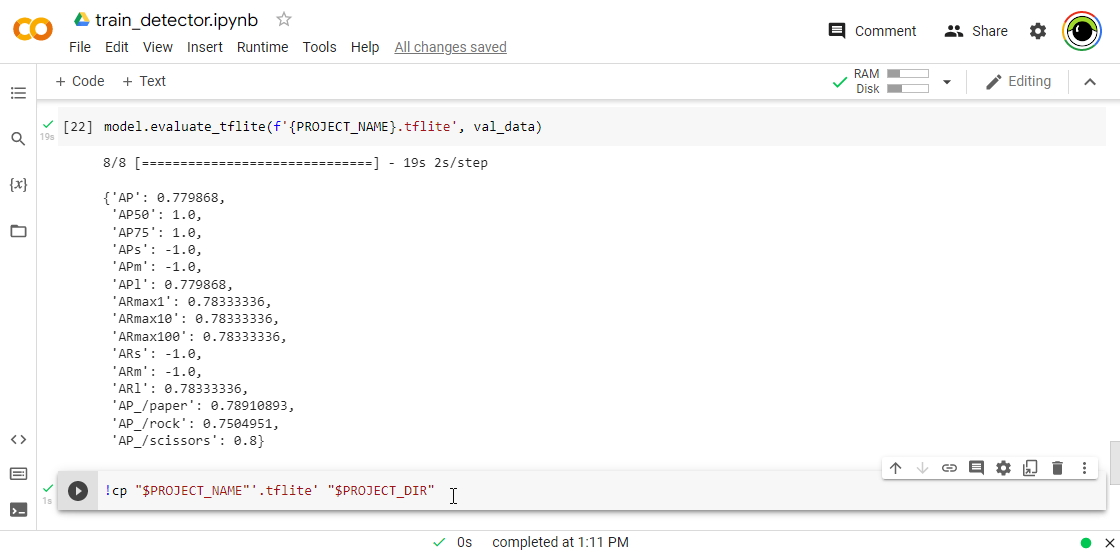
After it's done, it will copy the CNN model it just created back to Google Drive. This happens in the last script command (see below). The green check to the left of the command indicates that it was able to successfully create the CNN model and copy it.
Congratulations! You're ready to test the CNN model you just created.
Testing
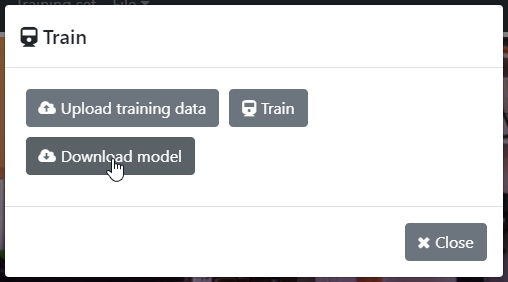
After the Google Colab script is finished, you can go back to the Vizy browser tab and from the Train dialog, click on Download model.
This will download the model file that the Colab script just created. After it's downloaded, it will run the model in the Detect tab so you can see how it performs.
Improving
After playing with it for a while, you will get an idea of how accurate your model is. Depending on your application's needs, the accuracy may be sufficient, but more often than not, more accuracy is desirable. (Is there such a thing as too much accuracy?) Fortunately, it's fairly simple to improve your model's accuracy within the Object Detector app. A straightforward way to improve your model is to copy the incorrect detections into the training set, label them correctly, and re-train the model. Let's do that.
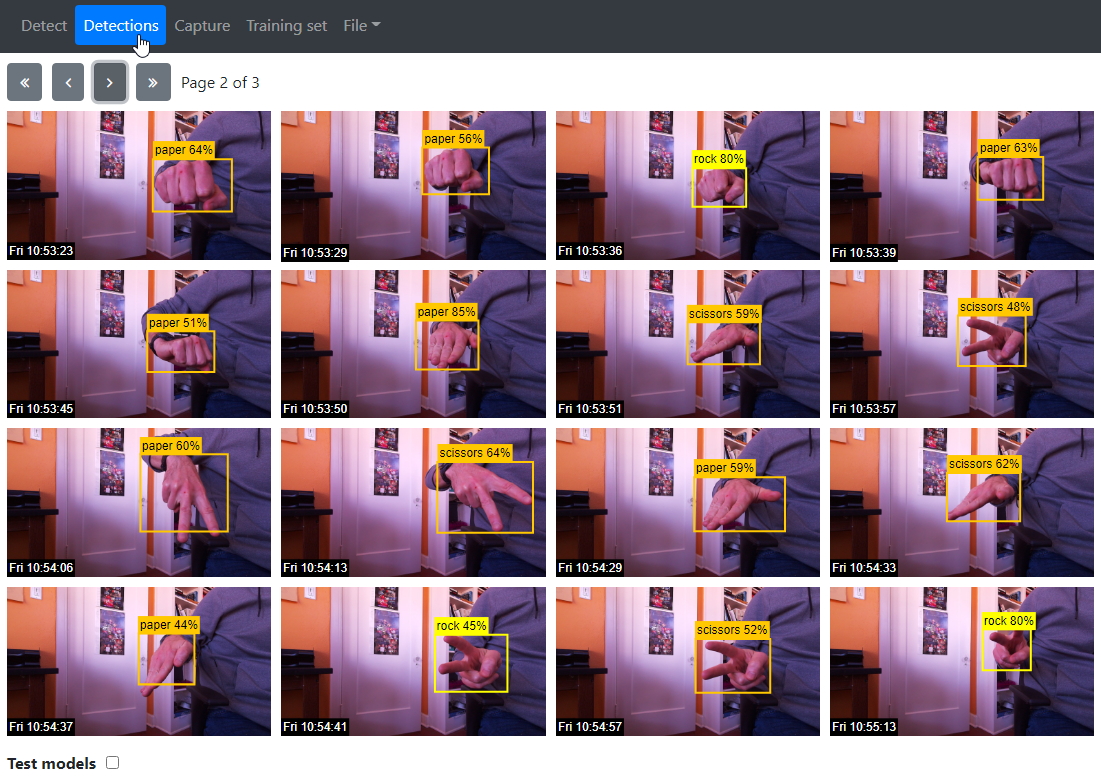
From the Detect tab, all detections are logged, including the incorrect detections. You can bring up all past detections in the Detections tab to get a better look.
As you can see, there are several incorrect detections. Clicking on any of the pictures brings up the picture dialog for that picture.
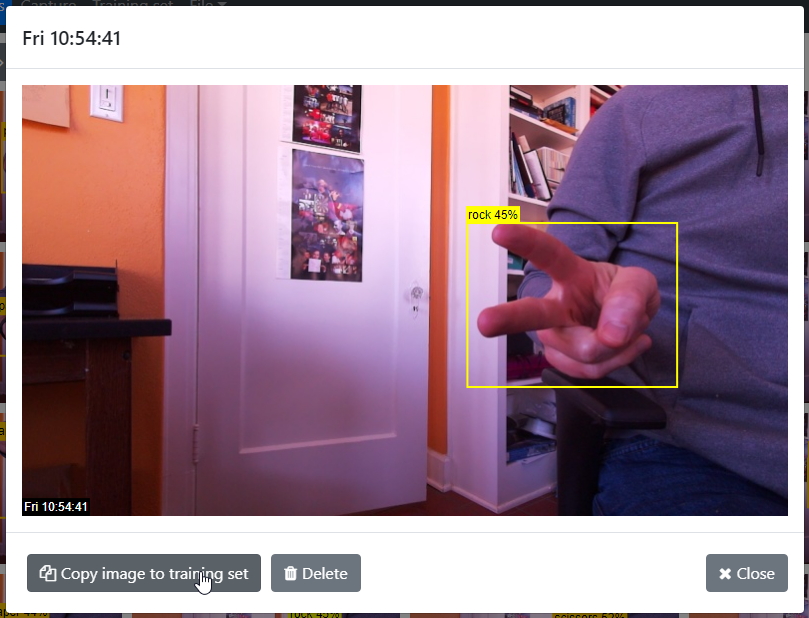
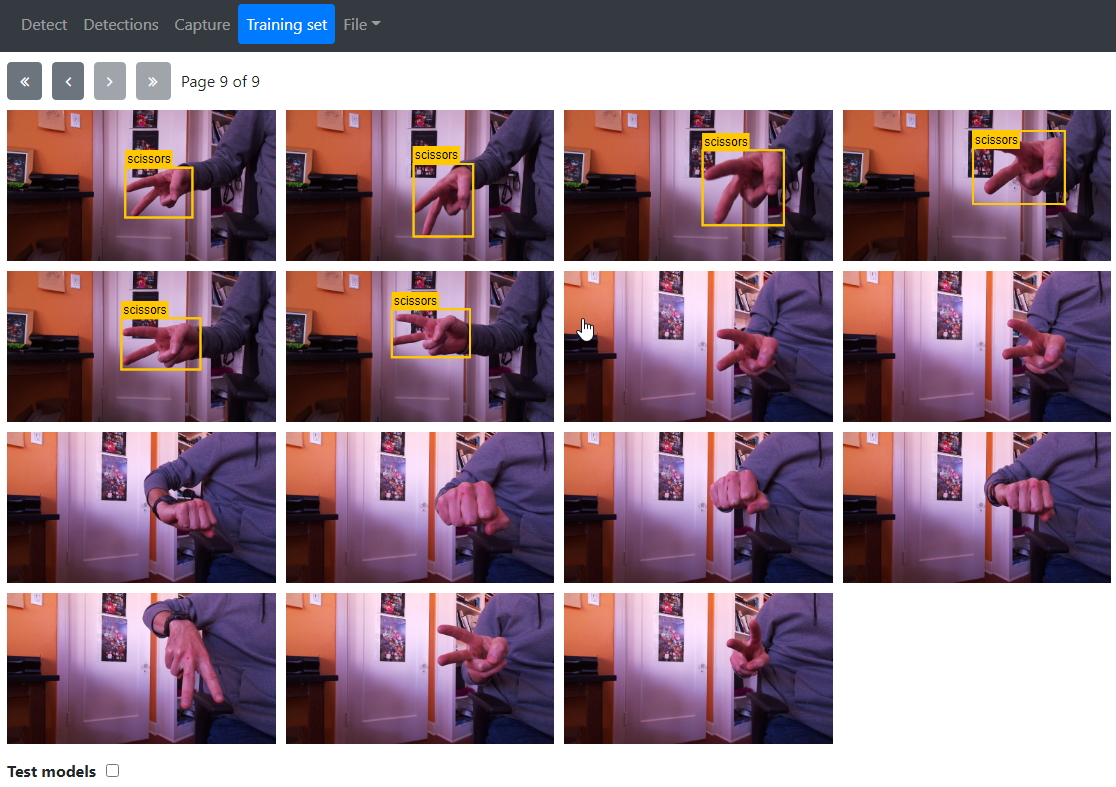
From here you can click on Copy image to the training set. It's recommended to go through all of the detections and copy all incorrect detections to the training set in this way. Next, switch to the Training set tab, and locate the copied images, which will appear on the last page as unlabeled images.
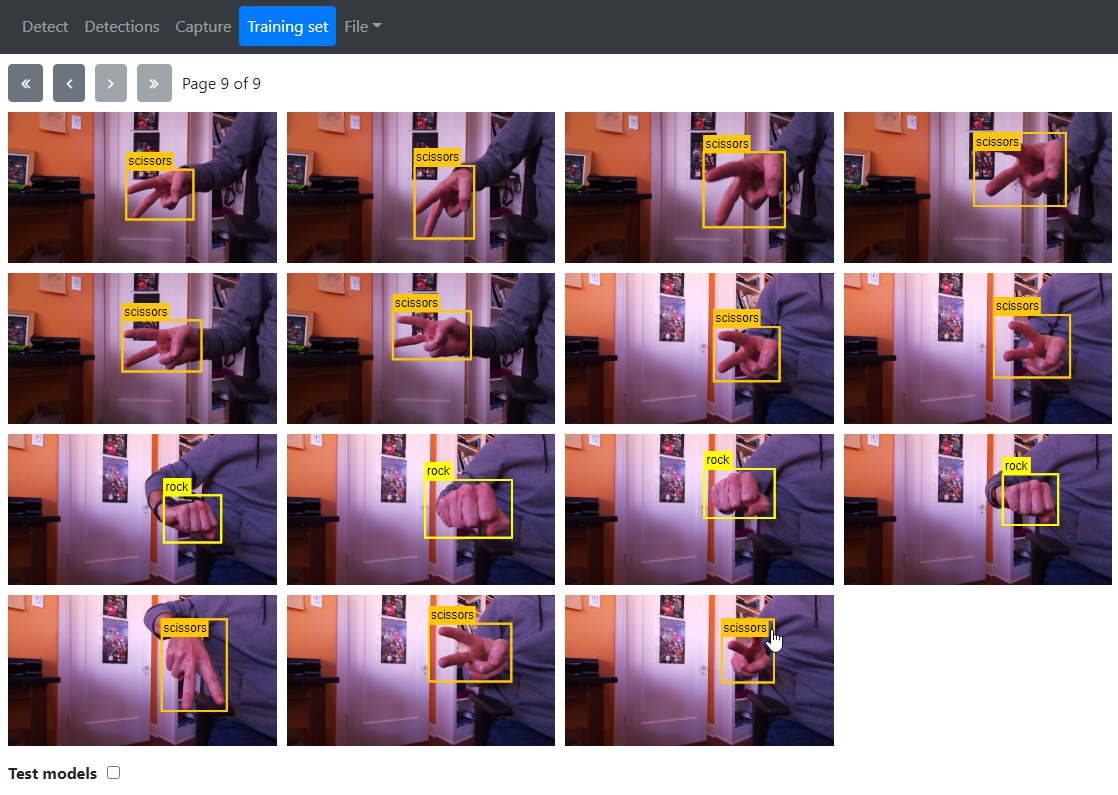
Go ahead and correctly label the images as we've done before.
False positives
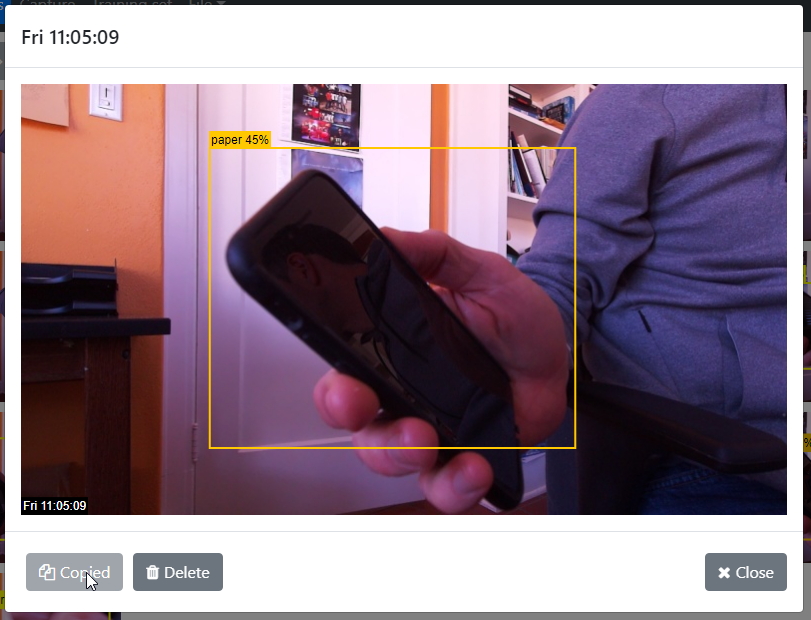
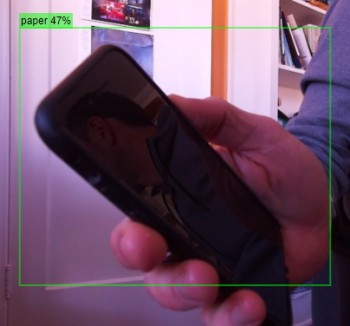
Sometimes none of the object classes are in the image, yet the model erroneously detects an object. These false positive detections are fairly common and can be pretty silly: “I'm 65% sure this thing in the image (chair) is a banana”, etc. For example, below the model sees a phone, something it hasn't seen before, and makes a guess: “I'm 45% sure this thing (phone) is paper.”
Copy these images to the training set also, but instead of labeling them, you'll leave them blank (no labels), which will tell the CNN “there are no objects of interest in this image”. By doing so, you're giving the model more information about the world – what's not an object of interest in this case – so it can make a more accurate inference.
Re-training, versioning, and verification
After augmenting the training set as we did in the previous section, it makes sense to re-train, which is done by simply repeating the previous steps exactly as before. That is, bring up the Train dialog, upload images, train, and download the new model.
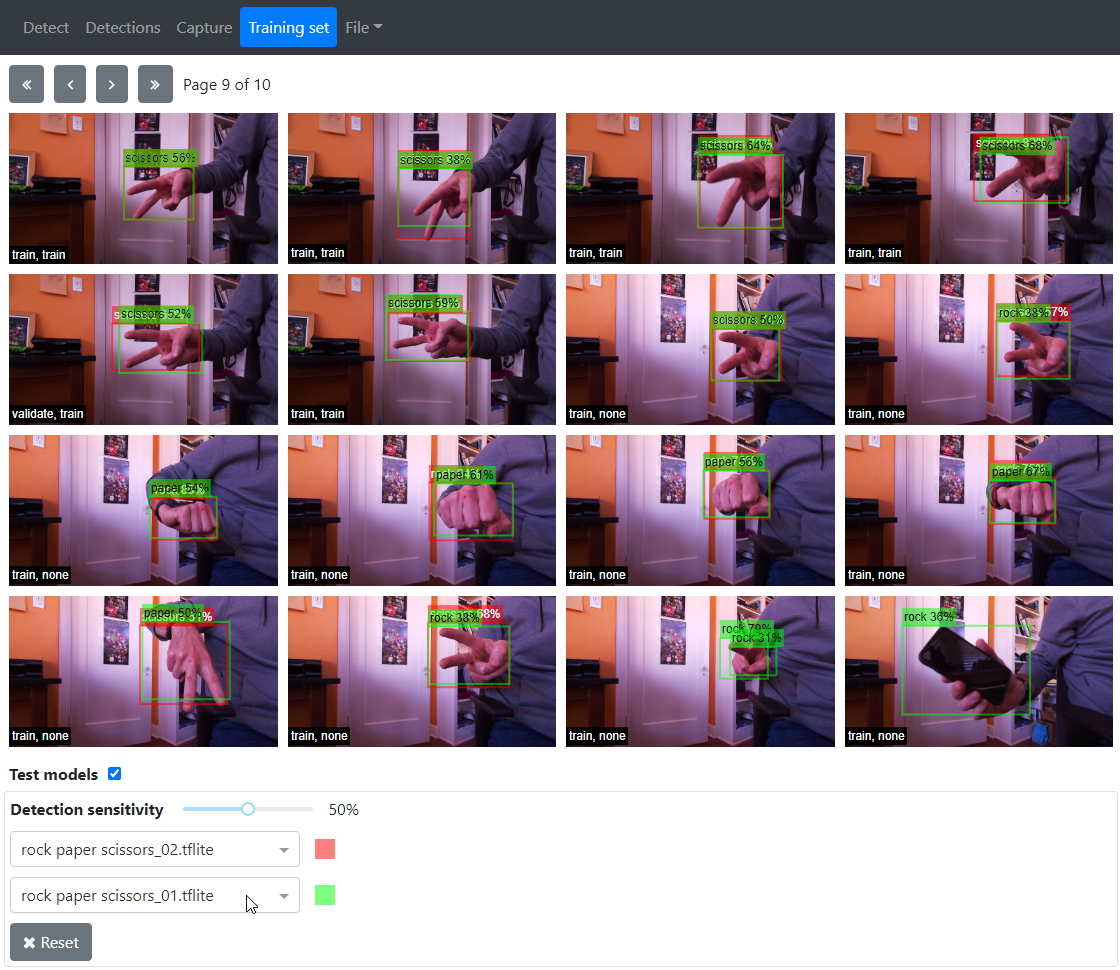
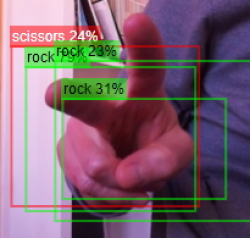
After you download the re-trained model, you will now have two model versions. In our example, the first version is rock paper scissors_01.tflite and the re-trained model is rock paper scissors_02.tflite. The model versions simply increment in this way, so you can keep track and compare previous versions with newer ones. Along those lines, you can easily check to see if the re-trained model has improved by enabling Test models at the bottom of the Training set tab. When enabling Test models, it automatically selects the most recent version as the first model version (in this case rock paper scissors_02.tflite). Selecting another model version in the 2nd dropdown allows you to do a simultaneous comparison to see how the two model versions behave. This is shown below where the boxes are red or green depending on whether the detection is version 02 or version 01, respectively.
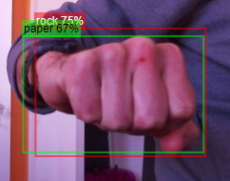
We can see that we improved (see below). (You can click on the individual pictures within the Training set tab to examine them more closely.)
How did we fare with the phone? It improved also – looking at the same picture, we can see that the previous version erroneously detects the phone as a paper gesture (as expected), but there is no red detection box, which indicates that the newer version has improved (learned).
It isn't perfect though, as shown below.
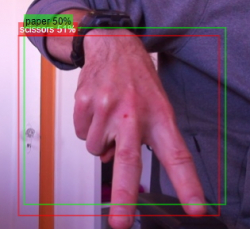
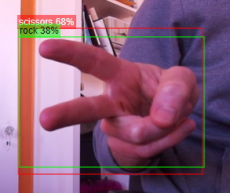
Despite being in the training set for the new model, it still has trouble detecting the scissors in this image. But if we increase the sensitivity to 62% with the Detection sensitivity slider in the Test models section, we can see (below) that the new model correctly detects the scissors, it's just not very confident at 24% certainty. We can also see that the older model has multiple overlapping detections, which is common. These multiple detections are often “filtered out” with a non-max suppression algorithm. The object tracking algorithm in the Object Detector app does this when running in the Detect tab.
If we wanted to, we could create pictures that look similar to this one and more effectively “teach” the CNN “these are scissors!” With additional similar images in the training set, the CNN will become more certain that this image and similar images contain scissors.
You can continue to improve the model in this way, adding more images, re-training, and creating new versions. Increasing the Detection sensitivity within Test models is an effective way to gain insight into how your CNN could be improved and what kind of training set images would benefit the accuracy the most. Additionally, you can enable Test models in the Detections tab to see how different models compare – again to gain more insight. And yet another way to improve the accuracy is to increase the training epochs.
Increasing training epochs
By default the training script in Google Colab sets the training epochs to 20:
(Note the epochs=20.) This provides a reasonable amount of training, but doesn't take too long. You can change this number to whatever you want (even hundreds of epochs) and re-run by selecting Run all from the Runtime menu or selectively running that line by clicking on the play icon to the left of the line (followed by running subsequent lines) in the script. Running more epochs just takes more time and there is a risk of overtraining. Overtraining is where the CNN just learns the training set and doesn't generalize well outside the training set. As before, you can test the new model by comparing it with models trained with fewer epochs to see if it improved (typically it does).
Increasing the epochs should probably be done when all of the more obvious gaps in the training set have been filled in. That is, if there are gaps in the training set that lead to inaccuracies, more epochs won't have as much benefit. Perhaps you can think of it as a “finishing touch” for a model.
Discussion
Object detection is a difficult problem in the field of machine vision. Detecting objects without a CNN usually takes advantage of visual cues and features such as hue, shape, contrast, etc. You essentially create a computational “model” of an object that the computer can use to perform the detection. This requires a decent amount of expert knowledge. You then code it up in C++ or Python. But addressing inaccuracies (there are always inaccuracies) typically means adding more lines of code – you add more feature extraction code, you adjust parameters, etc. It takes additional expert knowledge, and it takes time.
With CNN's we've seen that when the model has inaccuracies, we can just add more training images in a way that targets the error (e.g. phones are not paper). Here, the detector improves as we discover detection inaccuracies. And we can just ask it to train longer to get accuracy gains with practically no effort. This is all easier than writing code!
This is a new tool, and we'll continue to develop and improve it. Help us by sending your questions, suggestions, and bugs to [email protected] or posting on the Vizy Forum.
Using a phone or camera to capture training images
Using a phone or camera to capture training images can be more convenient than capturing them with Vizy itself. It's straightforward – just follow these steps:
- Capture the relevant training pictures with a phone or camera. This is straightforward with the Google Photos App. It will automatically upload any pictures that you take on your phone to your Google Photos account. Similarly, you can upload photos from your camera into your Google Photos account by first downloading them into your computer and then uploading them to Google Photos through your browser.
- Create an album and copy these pictures into the album. This can be done from your phone via the Google Photos App or from your computer via a browser.
- Share the album with your Vizy's Google account. Similarly, you can do this from your phone via the Google Photos App or from your computer via a browser. From the album you can click on share or click on the context menu to select share, then type in the Gmail address of the account you wish to share the album with. You may need to type in the complete Gmail address associated with your Vizy camera for the account to show up.
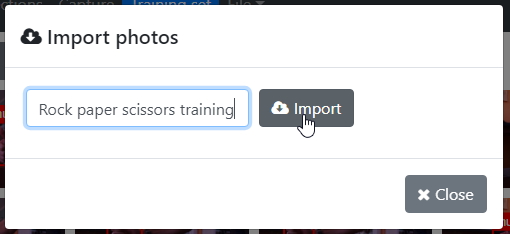
After clicking on Import, Vizy will locate the album, retrieve the images, and add them to the end of the training set. So after it's done, go to the last page(s) of the training set to see the imported images. Bear in mind that the album name is case-sensitive. If Vizy has trouble finding the album, make sure you can see the album from the Google Photos page while logged in via your Vizy's Google account. Once the images are imported, you can label them as before. Easy-peasy!
Exporting, importing, and sharing CNN projects
Through the powers of the Internet (and Google Drive), you can export your project and share your CNN efforts with others. And they can import your project to evaluate, improve, and share it back with you and possibly others. When exporting a project, all of the training set images, models, and settings are zipped up and uploaded to Google Drive. (Note, the detection images are not included when you export a project.)
Exporting a project
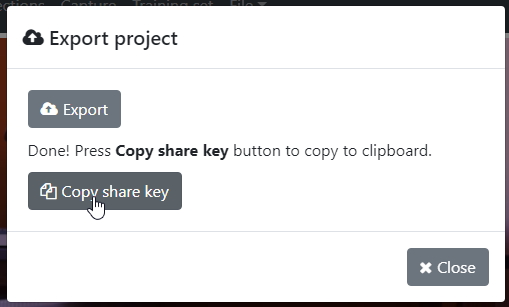
From the File menu select Export project… to bring up the export dialog. Click the Export button. Vizy will then get busy zipping up the project and copying it to Google Drive. When it's finished it will present you will a Copy share key button.
Pressing this will copy the “share key” to your clipboard. The share key is just a jumble of text. You can save the key to a text file, email it, etc. With this key, someone can import your project.
Importing a project
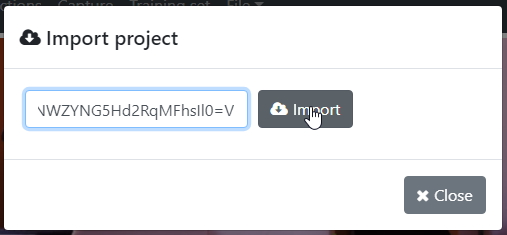
From the File menu select Import project… to bring up the import dialog. Copy the share key into the text box and click the Import button. Vizy will then get busy downloading the zip file, unzipping, and installing the project. Easy!
Customized handlers
For more advanced users who want to add their own custom features, the Object Detection application has handler code for various events and for text messages. For example, Vizy could click a relay, turn on a light, trigger a sprinkler valve, etc. if it sees a particular object. The handler code is in /home/pi/vizy/apps/object_detector/handlers.py. Note, you can bring up the handler code easily from Vizy's built-in text editor by clicking on the ☰ button in the text editor and selecting handlers.py. Note also, once you change handlers.py you can simply click reload/refresh on your browser and Vizy will automatically restart the application and your code changes will take effect.
Event handler
The event handler function is handle_event, which is called when an event occurs:
def handle_event(self, event):
    print(f"handle_event: {event}")
    ...
Here, the argument self is the Object Detector class object and event is a dictionary with various values depending on the event. In particular, the event_type value specifies the type of the event. The different types are listed below:
- trigger: This event indicates that a trigger class object has been identified. The image and timestamp are included. The default implementation of
handle_eventsends a text message with the object class, timestamp and image. - register: This event indicates when an object has entered the scene. The objects are listed in the dets field.
- deregister: This event indicates when an object has left the scene. The objects are listed in the dets field.
- daytime: This event indicates when it has entered the “daytime” state and has enough light to reliably identify objects.
- nighttime: This event indicates when it has entered the “nighttime” state and is inactive.
Text handler
Do you want Vizy to respond to your text messages? The text handler function is handle_text, which is called when Vizy receives a text message via Telegram. handle_text is called when none of Vizy's text handlers know how to handle the text message.
def handle_text(self, words, sender, context):
    print(f"handle_text from {sender}: {words}, context: {context}")
Here, the argument self is the Object Detector class object, and words is the list of words in the text message. sender is the person that sent the text and context is a list of contextual strings.
