This is an old revision of the document!
Table of Contents
Getting started with the outdoor enclosure
Vizy's outdoor enclosure does an excellent job of keeping Vizy safe and sound inside (it's IP66 rated), and it has integrated IR lighting for nighttime use.
Mounting Vizy in the enclosure
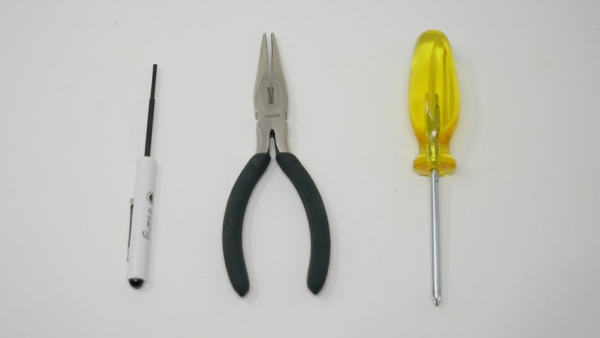
The outdoor enclosure includes IR light to gives Vizy the ability to operate reliably in all weather conditions and at nighttime. It’s IP66 rated and includes wire seals. To install your Vizy in the outdoor enclosure, you will need the following tools: medium phillips screwdriver, Vizy screwdriver (or small phillips and standard screwdriver), needlenose pliers.
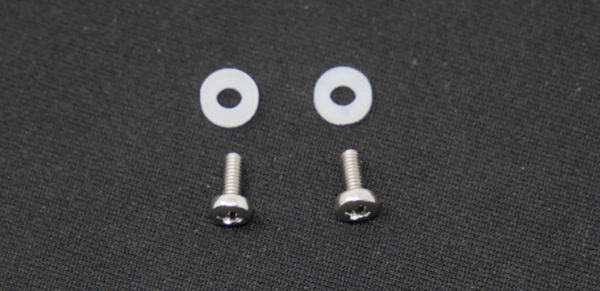
The outdoor enclosure has extra space inside to accommodate a wide range of lens lengths. Depending on the length of the lens, you'll want to mount Vizy in different holes on the mounting bracket. Mounting Vizy as close to the front of the enclosure is preferable to prevent internal reflections from being visible in Vizy's images. Start by finding the M3 fasteners and the 1/16“ spacers.
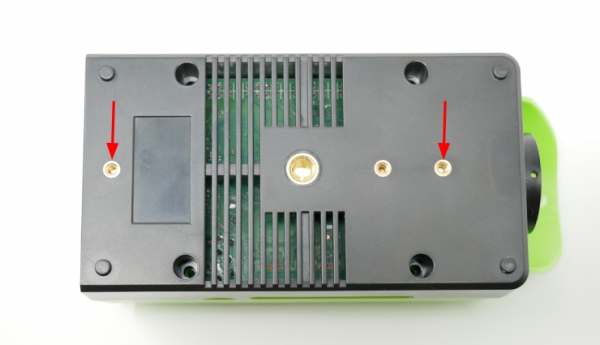
Take note of the three M3 threaded inserts on the bottom of Vizy. The front-most and rear-most are the inserts we will use to mount Vizy to the mounting bracket.
Wide-angle lens
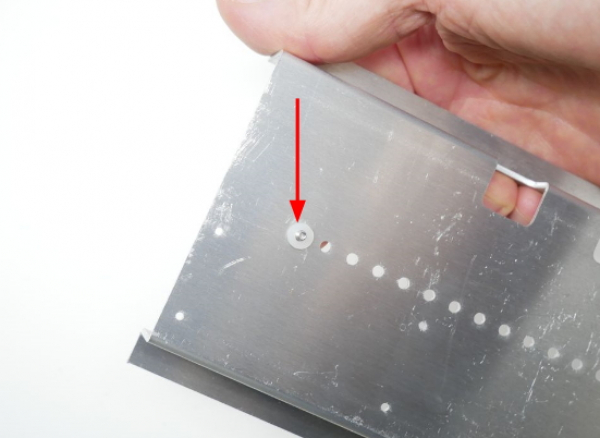
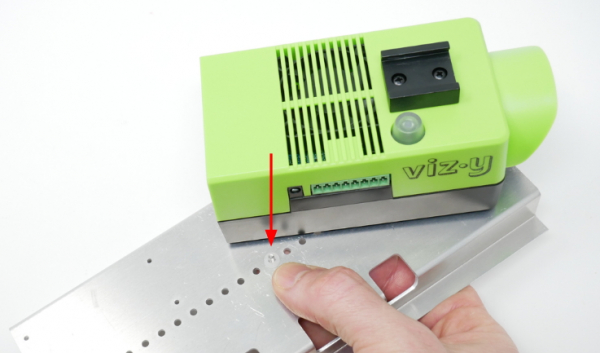
If you want to use the wide-angle lens (short lens), start by inserting an M3 fastener in the hole as shown – don't forget to add the spacer.
Thread the fastener into the front-most threaded insert on the bottom of Vizy, but do not tighten yet.
Locate the rear-most threaded insert by sighting through a hole in the bracket to determine which hole to use in the bracket. (Or you can count 11 holes back from the front fastener.) Rotate Vizy to the side and insert an M3 fastener with spacer into the bracket hole.
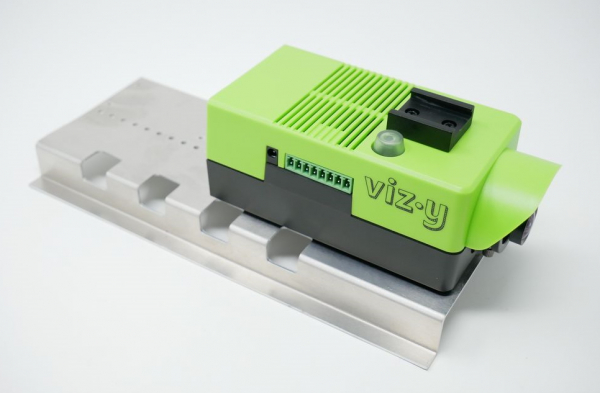
Rotate Vizy back and thread the fastener into the rear-most threaded insert. Tighten both fasteners.
Zoom lens
If you want to use the 8-50mm zoom lens, start by inserting an M3 fastener in the 5th hole from the rear of the bracket as shown – don't forget to add the spacer.

Thread the fastener into the rear-most threaded insert on the bottom of Vizy, but do not tighten yet.

Locate the front-most threaded insert by sighting through a hole in the bracket to determine which hole to use in the bracket. Rotate Vizy to the side and insert an M3 fastener with spacer into the bracket hole.
Rotate Vizy back and thread the fastener into the threaded insert. Tighten both fasteners.
Wiring things up
Included with your outdoor enclosure is a cable for powering the IR light and a button for powering on/off your Vizy while it's in the enclosure. Start by removing the back cap. Use a medium-sized phillips screwdriver to remove the back cap.
Remove the hex nut that's threaded onto the button and insert the button into one of the holes of the back cap. Use needlenose pliers to tighten the nut to keep the button secure.

Insert the wires of the IR light and button into the terminal connector as shown below.

Note, when using the terminal connector, first loosen the fasteners by turning them counter-clockwise to open the internal clamps. Then insert the wires and tighten by turning the fasteners clockwise.
Testing
Before putting everything back together, let's first test to verify everything is wired up correctly. Start by plugging the terminal connector into your Vizy, then plug your Vizy into power and power it on using the normal power button (Note, the external button hasn't been configured yet to turn on your Vizy.) Point your browser to your Vizy. (Please refer to the getting started guide if you need help with connecting to your Vizy, etc.)
IR light
Begin by plugging the IR cable into the IR light in the front cap.

The IR light is software-controlled and normally the pins on Vizy's I/O connector don't supply power until you tell them to do so. The easiest way to enable power (currently) is through Python code, or by bringing up a Python interpreter.
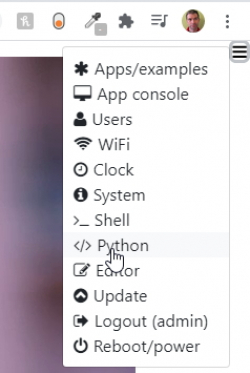
To quickly test things out, bring up a Python interpreter by clicking on the ☰ icon in the upper right corner and selecting Python.
This will bring up a Python interpreter. Within the interpreter type in the following:
from vizy import VizyPowerBoard
pb = VizyPowerBoard()
Then to turn on:
pb.vcc12(True)
To turn off:
pb.vcc12(False)
You can tell if the IR light is on by noticing that the individual LEDs glow red. Note, this method of turning the IR LED on and off is just for simple testing. Applications will do this in a more automated way.
If you suspect the IR LEDs aren't lighting up, be sure to recheck the connections, especially those going into the terminal connector.
Note, as long as you have your browser pointed at your Vizy, now is a good time to make sure the Vizy's lens is focused.
External button
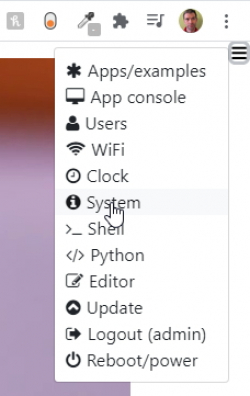
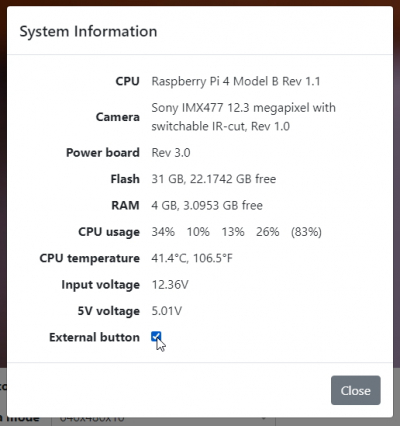
To test the external button, we first need to enable it. Bring up the System menu
and check the External button checkbox and close the dialog.
You should notice that the LED on the button turns on when you check the External button checkbox. Now try to power down your Vizy with the external button by depressing it for several seconds.
If your external button doesn't seem to work, be sure to carefully check the connections, especially those going into the terminal connector.
Power over Ethernet
If you are using the power over Ethernet splitter, go ahead and follow the installation instructions here.
Final integration
- Start by unplugging the IR cable from the front cap.
- Slide the bracket with Vizy from the back of the enclosure extrusion.

{{}} - Disconnect power and/or network cable and route through the hole in the back cap.

{{}} - Place power and/or network cable into the wire seal as shown

 {{}}
{{}} - Pull the wire seal through the hole in the back cap until it snaps into place
 {{}}
{{}} - Attach back cap to extrusion and tighten fasteners.

{{}} - Plug in the IR cable into the front cap.
- Attach front cap to extrusion.
- Before tightening the screws on the front, cap you might make sure that the lens is focused and the glass in the front cap is clean.
- Use two or three of the cable ties to cinch the wire seal around the wires.
Your Vizy is now snug in its enclosure and safe from the elements. ![]() You can use the 1/4-20 fastener nut on the bottom of the enclosure to mount your Vizy where you would like.
You can use the 1/4-20 fastener nut on the bottom of the enclosure to mount your Vizy where you would like.

